
Video Development Technologies
Choose the best options for filming, editing and producing your videos
The information provided below was gathered during the Spring 2014 virtual workshop on Designing and Using Video in Undergraduate Geoscience Education It is not an exhaustive list, but rather a brief review/summary with some recommendations and tips for using various kinds of technology when producing educational videos.
Filming your video
Common problems can be avoided by careful preparation. Plan ahead!
- Prepare your film location
- Prepare your cameras
- Prepare your actors
Choosing the right equipment
Filming can be done with a wide range of video cameras including: Google Glass, Cell Phones, Unmanned Aerial Vehicles, Underwater Vehicles (manned or unmanned), built-in webcams or USB video cameras, point-and-shoot cameras (such as GoPro Hero 1/2/3), Digital Single-Lens Reflex (DSLRs), and video recorders (camcorders). Remember --- each of these options has its pros and cons.
Capturing audio
Some things are better seen & not heard
Indoors
Even in an enclosed room, wind, air, and camera-movement can distract from the speaker. We are used to tuning out ambient noise, but if you put on ear phones, you quickly realize home much noise is in the environment. And it gets amplified in sound recordings that don't discriminate.
Some things to consider:
- External microphones are excellent for inside. Directional mics are also good for indoor recording.
- See the basics in this 2-min video: Museum Design Collaborative project -- Sound Tips
- Description of Microphones from BH Photo has more on directional mics
- A muffler on the microphone stops the buffeting sound. Foam covers are good enough for inside, though the more-expensive faux-fur covers are the best.
- A wind shield or screen can go a long way towards reducing background noise. A windscreen is simply some kind of acoustic-foam used to minimize abrasive sounds, while allowing the desired audio to record. Egg-shell foam camping pads work well to build yourself a decent "fort" to surround your recording equipment.
- Strange sounds your mouth makes can be very distracting. Professional speakers have to train to learn how to eliminate odd sounds that are involuntarily emitted.
- Audacity is a free software that lets you practice speaking while watching an audio timeline to see where your voice has audio spikes.
- Microphone covers help lower the chance that the mic will pick up the "popping sounds" of your voice while speaking.
Outdoors
Wind is the greatest challenge to high-quality audio outside. The trouble with the wind is that it doesn't end up sounding like wind, but becomes an abrasive, popping, and screeching sound that's difficult to listen to.
- Omni-directional mics are much more resistant to wind than directional mics. Directional mics pick up the annoying buffeting sound that overwhelms conversation.
- How to make a do-it-yourself shotgun mic
- Fur - not foam - for wind muffling. Foam mic shields are useless for outdoors unless there's very little wind. You need the furry ones that look like animal puppets. The most affordable ones are called "dead cats." They are not cheap, but you can sew a faux-fur cover of your own, or, if you have a directional mic, you can buy a $7 seat-belt pad with a velcro to wrap the mic.
- A wind shield or screen is a great way to reduce wind noise. A field version can be as simple as duct tape and a cardboard sheet.
- Gauze for pinhole mics on digital cameras. To prevent wind noise, tape the gauze padding of an adhesive bandage over the camera's mic.
- Film with a headset to emphasize ambient noise. We are good at tuning out white noise, but using a headset will ensure the you hear everything.
- Disconnect the video from the audio. You can always do a narration voice over, but make sure your subject isn't talking. Trying to synch audio after the fact is extremely difficult.
Echoes
- Climb in the closet. To reduce that tinny echo when recording yourself, record the audio in a room with abundant fabric to absorb sound (bedroom, closet). Or create your own "sound proofing" by building a small "fort" around your computer with egg-foam sleeping pads. An office with many hard reflective surfaces is the worst. The bigger the room the more echo you will get.
- Make sure the mic works. Look for switches on your camera. On digital cameras, check the manual to be sure you understand what Mic, Line-in and Line-out mean.
- Check your computer ports. A mic that works on one computer may not work on another. Many microphones and other accessory products will draw power from a USB port, but not every port on your computer will allow the accessory to draw the same amount of power. Try a different port or purchase external ports, and make sure your audio peripherals are compatible before you buy.
Capturing a screen
One effective way to "film" video is through a capture of your computer screen. You can capture a presentation with slides; a narrated how-to as you move through the use of a particular computer software product, website, assignment or other screen-projected image or animation; or you can capture a drawing you make on the screen. A mouse tablet will help with all of these types of screen capture, as it more easily allows you to draw on slides or the screen. Bamboo Tablets are one of the most commonly used writing tablets. They come with their own software, as do many other currently available tablets.
Get started
One of the biggest challenges with screen capture software is ensuring your audio and video stay synched. One way to overcome this challenge is to lay down separate audio and video tracks in your video editing software later. Or just be aware ahead of time that this is an issue and test for it in your software.
Before starting your recording, close all non-essential software programs and clear your toolbars. You don't want to accidentally capture something you didn't want students to see.Choosing the right software
These software reviews were provided by participants at the Spring 2014 virtual workshop on Designing and Using Video in Undergraduate Geoscience Education.
- Platform: iOS (app for iPad)
- Cost: free
- Platform: Mac (can be found in app store), Win XP, Vista and 7
- Cost: $19.99
- Platform: Mac, Win
- Cost: free
- Platform: Windows, Mac OS
- Manufacturer: Microsoft
- Platform: Mac, Win, Chrome
- Cost: $29.95 education pricing
Video editing
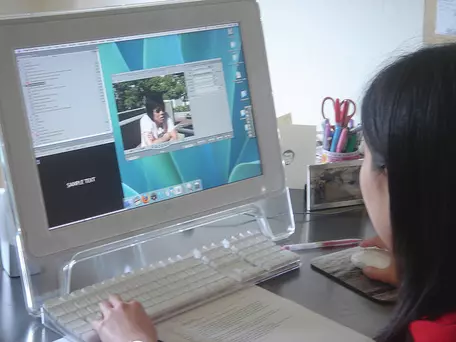
The biggest initial challenge for many people is making sure their camera and their editing software are compatible. The good news is, there are many software options to choose from.
Another challenge is that some cameras (especially iPhones and iPads) shoot such high-resolution video that the editing software doesn't have enough memory to hold it. One solution to this problem is to open the file and immediately export it at a lower resolution. Another option is to play back the file without editing, and use a screen capture software to create a lower-resolution version; one drawback is that this may reduce the resolution more than you want.
Software types and choices
Single-layer editing software can combine audio and video clips on a single timeline, moving them around in order, and clipping them as desired; you can also add text, but you cannot have multiple images or video showing on the screen at the same time or multiple sounds. You also cannot create animations.
Examples:
- Apple iMovie
- Windows:Live Movie Maker
- YouTube Editor
- Google+ Hangouts
- Quicktime
- Quicktime Pro
- Wirecast
- Tegrity from McGraw-Hill (works with Blackboard)
Multi-layer editing software can combine multiple clips along a timeline, overlaying them atop one another, and adding other features such as labels, titles, animations, and multiple sound tracks.
Examples:
- TechSmith Camtasia
- Crazy Talk Animator
- Toon Boom Studio
- 2D Smith-Micro's Anime Studio
- 3D Cheetah
- Adobe AfterEffects
- Flash
- GoAnimate
- Final Cut Pro
- Adobe Premier
Choosing the right software
These software reviews were provided by participants at the Spring 2014 virtual workshop on Designing and Using Video in Undergraduate Geoscience Education.
- Platform: Windows, Mac OS
- Cost: $20/mo through Adobe Creative Cloud
- Platform: Mac/Win
- Cost: $299 education pricing
- Platform: Mac, Win XP and higher
- Cost: $75 Mac education pricing | $175 Win education pricing
Video production
Saving, exporting, loading online
Choose the right resolution and file format
Each device or platform (laptop, iPad, cell phone, TV screen, etc.) prefers a different resolution (for example, YouTube prefers High Definition resolution of 1280 pixels by 720 pixels). To accommodate a variety of uses, you might need to produce your video in multiple formats and make it available through multiple websites and platforms.
Alternatively, pick a format and size that has the greatest versatility. Test it on a variety of devices and browsers. It's probably best to determine the highest resolution you want first, and produce at that higher resolution from the beginning. Then you can reduce it later as necessary. Keep your videos short to avoid making the size too large to upload.
Deploy through multiple media
Videos can be published for use in a DVD player, for playing direct from a computer hard-drive, or streaming from the internet. If publishing to the internet, there are a number of video-hosting sites, including YouTube, TeacherTube, TedEd, Screencast and more. You can also host your videos on a college or university server. There are pros and cons to each of these. For example, if your video has closed-captioning or embedded quizzes that are accessed through an outside shell (accessed through a .html page rather than direct from the video), you will need to host on a site that accesses videos via .html (usually that means your college server, not YouTube).
Additional Resources
- Wikipedia Video Editing Software Comparisons
- DP Review website: Cameras
- Using an iPhone camera - resources provided by Scott Brande
- Equipment needed for mounting a tripod (Acrobat (PDF) 791kB Mar3 14)
- Making Video (Acrobat (PDF) 653kB Mar3 14)
- Shooting Time Lapse Video: Part I - Capturing time lapse images on cellphone
- Shooting Time Lapse Video: Part II - Assembling image sequence into time lapse movie with QuickTime Pro 7
- COSEE Ocean: Make Your Own Video: A Simple Guide to Communicating Your Research Effectively
- Museum Design Collaborative project -- Sound Tips
- Museum Design Collaborative project -- Camera Tips
- A Scientist's Guide to Shooting in the Field -- Skypunch Creative
- Podcast Solutions -- The Complete Guide to Audio and Video Podcasting, Michael W. Geoghegan and Dan Klass.
Audio and video for the web are very well described in this book. Whether you're interested in podcasting or not, it's a very useful resource.