
Going Further
Variations
NASA's Earth Observatory frequently posts a single image file that shows both a before-and-after image of the same place. Follow this technique to create two separate images from the single file so you can put them into a stack. Go to Earth Observatory's before-and-after images of springtime flooding in Argentina.
- Read through the story to learn about the events responsible for the differences in the two images.
- Download the single image file that shows both images. Save it in an obvious place such as your Desktop or Downloads folder.
- Launch ImageJ and open the file from within it.
- From ImageJ's toolbar, choose the rectangular selection tool. Place your cursor on the image and drag a selection box over the top picture. Use the arrow keys to move the selection into the upper-left corner of the image. Use the handles to adjust the selection size to include the date below the image.
- From ImageJ's menu bar, choose Image > Duplicate... and accept the default name.
- Click the large image again to activate it. Click inside the yellow selection rectangle and drag it down over the bottom image. It is essential that the selection rectangle remains the same size.
- Choose Image > Duplicate... and accept the default name again.
- Once you have the two images in separate windows that are the exact same size, activate the large image again and close it.
- From ImageJ's menu bar, choose Image > Stacks > Images to Stack.


Other Data
EarthShots: Satellite Images of Environmental Change is a collection of registered time series images taken by Landsat instruments since 1972. You can use the same techniques presented in this chapter to annotate changes in almost any of the images on this site.
Check the Images Index at NASA Earth Observatory to find before-and-after images that they have prepared for their image of the day feature. Time-series images are not identified consistently, so they require visual inspection to locate the image pairs.
Another example of an annotated deforestation map is available from Earth Observatory.
The NASA Earth Observatory: World of Change features many other sets of images that would be appropriate to use with the techniques described in this chapter.
Other Techniques
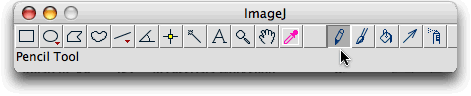
For images where areas of change are too small to outline with the freehand selection tool, you can change the color of one pixel at a time by clicking them with the pencil tool.
Case Studies with Tool
Other EET chapters that utilize ImageJ as a tool and satellite imagery as a data source include the following:
Using NASA NEO and ImageJ to Explore the Role of Snow Cover in Shaping Climate—Investigate satellite images displaying land surface temperature, snow cover, and reflected short wave radiation data from the NASA Earth Observation (NEO) website. Animate the images and compare them with the NEO ICE tool.
Using Satellite Images to Understand Earth's Atmosphere—Use ImageJ to create an animation showing the change in monthly concentration of aerosols over the course of a year and compare it to a similar animation showing change in carbon monoxide concentration.
Analyzing the Antarctic Ozone Hole—Measure and graph the area of depleted ozone from Total Ozone Mapping Spectrometer (TOMS) images.
Exploring and Animating GOES Images—Transform a time series of GOES images into an animation. Plot a storm track and determine storm speed.
Measuring Distance and Area in Satellite Images—Use ImageJ to quantify change over time in satellite images.
Shrinking Forest - Growing Problem—Use time-series Synthetic Aperture Radar (SAR) images to create a color composite image showing the oldest to most recently deforested areas in the Amazon rainforest.
Whither Arctic Sea Ice?—Animate thirty years of sea ice images, measure the ice extent each year, and then graph and analyze the results.
