Part 2 - Practice Using a GPS Device
Step 1 – Introduction to Global Position System (GPS) Recievers
If available, use a document camera and projector to demonstrate how to use a GPS, and how to mark a waypoint with the GPS. This tutorial demonstrates a Garmin eTrex Legend. However, other GPS units can be used for this activity. If you are using a GPS unit other than the Garmin etrex Legend, consult your user's manual to follow these same general steps.
- Locate each of the external buttons on the GPS reciever. The function of each is described below.
- Use the Power button to turn on the GPS unit. Cycle through each of the different pages by pressing the Page button.
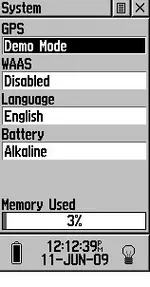
- On the GPS unit use the page button to navigate to the Main Menu page. Scroll down and select Setup and click on it. Under System choose GPS, press, and scroll down the list, and use the ClickStick to select Demo mode. The GPS will stop searching for satellites and appear to have a signal, but it is only for demonstration purposes. Note: Before using the GPS outside be sure to exit from Demo mode and set the GPS back to Normal mode. This can also be done by turning the GPS off, then on again.
Zoom Out — On the Map page it will zoom out for a wider view. Use the scale on the map to see the change in zoom level. Zoom In — On the Map page it will zoom in for a closer view. Use the scale on the map to see the change in zoom level. Menu / Find — Press this button to bring up context specific menu. Press and hold the button to go to the Find page. ClickStick — It works like a mouse or joytstick. With it you can move left, right, up or down. Select and item by pressing this button down. It is also called a Thumbstick. Page / Quit — Press this button to cycle through all of the pages. Power / Backlight— Press and hold this button to turn the GPS on and off. Press it once quickly to turn on the backlight.

Step 2 – Exit Demo Mode, Go Outside, and Check Satellite Reception
- Go outside to an area where the GPS unit has a clear view of the sky.
- Turn off Demo mode and return to Normal mode.
- Use the ClickStick or Page button to move through each of the pages.
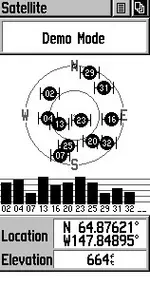
- Note how the Satellite page shows the number of satellites the receiver is picking up and the strength of the signal. The satellite strength is indicated by the bars.

Step 3 – Save a Waypoint
A waypoint is a term to describe a position (location). The GPS will save the coordinates in the memory of the GPS. Most GPSs can save at least 500 waypoints.
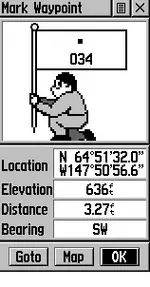
- Press in and hold the ClickStick until the Mark Waypoint screen appears.
- The GPS will give a number to the waypoint. This can be edited to a more useful name by using the ClickStick to change the name. For this activity, accept the default number for each waypoint and click OK to save the waypoint. Be sure to fill in the number of the waypoint and the coordinates on the Data Sheet when collecting data outside.
- Click OK to store the waypoint.
Map will show the Waypoint on the Map page.
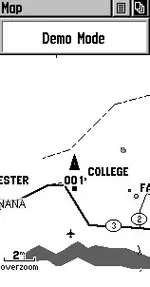
GOTO will set the GPS to navigate from the current position to the waypoint. - Navigate to the Map page. The waypoint you just saved should show on the map. For example, waypoint 001 shows on the Map below.
- While on the Map page, practice using the Zoom in and out buttons.
- Find the list of waypoints by pressing the Find button on the lower left side of the GPS, or choose Find from the Main Menu screen.
- From the Find screen choose Waypoints > Select by Name. All of the waypoints stored in the GPS will be listed. To select an individual waypoint use the ClickStick to highlight the waypoint and click to select the point. (in this example 007 is selected).
- A screen showing information about the waypoint will come up with three options at the bottom of the screen. The three options are Goto, Map and OK. Choose Map to review the location of the waypoint.


